
Macs are booming, more and more people buy them and many of them do it second-hand, Macs from years between 2008 and 2012, computers that even today can give a lot of war, however for this you have to give them a little push.
In this guide we will show you various things, you will see all the options you have to update your "old" Mac so that the hardware can accompany the software and they do not have nothing to envy to the latest modelsWe will see tips on how to maintain the hardware so that our Mac has a very long useful life and we will even review the main applications that will enhance the use of your computer to limits that you did not even suspect.
Who is this guide for?

This guide is for all those who have a Mac. If you have an old Mac you can see a guide of components that will allow you give a new life to your team, If you are one of those who have a Mac that is not so old but not the latest model, surely you will find some component that can put your computer at the height of the newest and software that will bring out the best in your computer, and finally, if you are the proud owners of next-generation Macs, you will find components that will allow you to expand your resources and above all software that will refine your user experience.
Ultimately, this guide is for everyone who owns a Mac (If it is compatible with OS X El Capitan much better).
Let's touch up the interior, what can we do?
For the old and not so old, Macs (Pros, iMacs, Minis, and MacBooks) allow some degree of upgrade, generally the easiest components to upgrade are storage drives, RAM modules, optical drives, and little else. precisely these components are in OS X key components that can give a new life to our team spending a much smaller amount than the cost of a new team.
Is your Mac slow? Let's try installing an SSD
If your Mac takes a long time to start the system and open applications (I understand you, the waits take forever), it is time to change your conventional hard drive (known as HDD) for a new SSD, watch out here, depending on our needs and our team can make one or another decision.
If your computer only supports a SATA device (this implies that either it does not have a CD reader or you do not want to remove it) we will have two options:
1. Replace the HDD with an SSD:
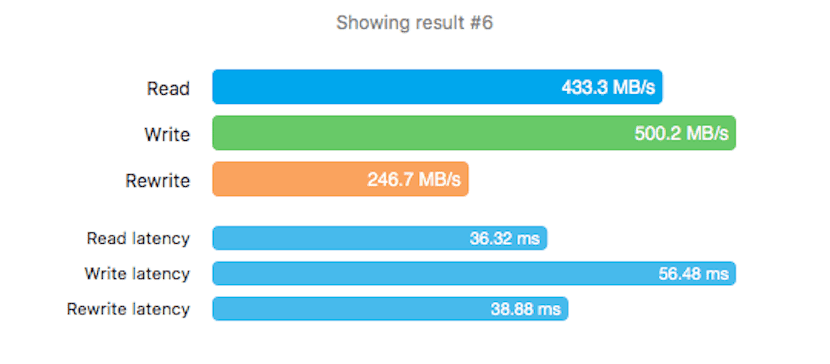
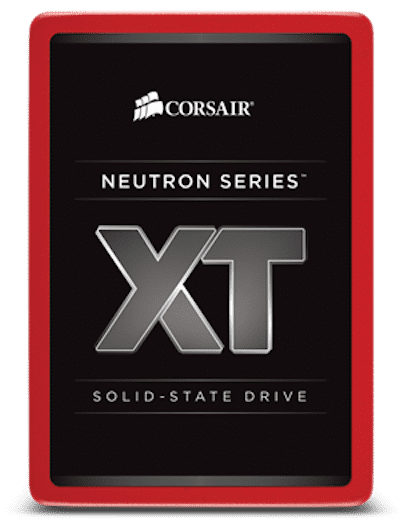
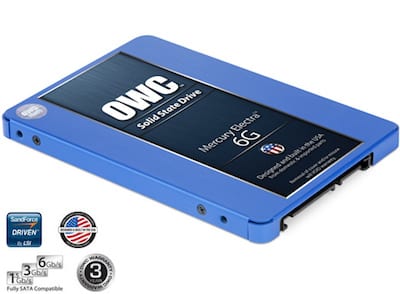
Advantages: We will obtain the highest performance thanks to the new speed, in this case I recommend an SSD from Other World Computing if you are users who browse the internet, developers or graphic designers, or a Corsair SSD if you are users more dedicated to video games or editing video and photography.
With an SSD your team will start in a few seconds and it will open applications before you know it, it will also load projects, video game screens and move files at an amazing speed of 6Gb / s, without a doubt this detail will make you believe that you have a new computer.
Disadvantages: A large capacity SSD can be “expensive”, if you want a 240GB one you can find it around prices between € 100 and € 140 (as long as you want a good one), and I recommend Corsair and OWC because they are brands that have proven to meet the highest quality standards. If you take cheap components, despite promising the same, you can find SSDs that reach 3GB / s or that have a very short useful life or give many problems. This is a very important factor: what you pay today will save you tomorrow.
Instructions by clicking here.
2. Use an SSHD
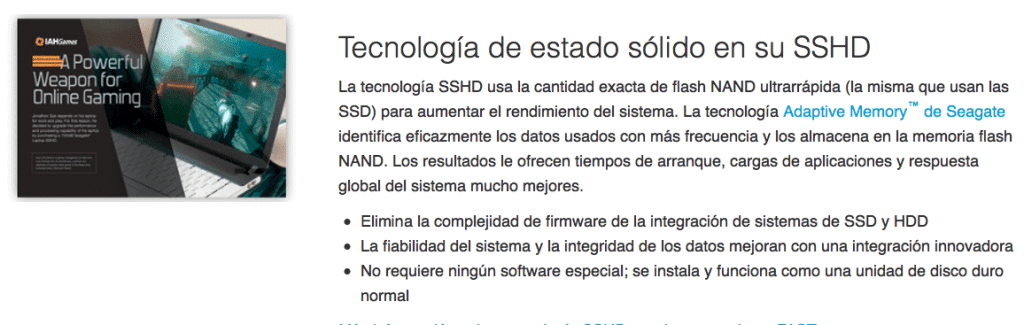
Advantages: This disk works similar to the Fusion Drive, it is a conventional HDD with a small amount of NAND Flash memory inside where the system (OS) is stored, with these disks we will have the best of an SSD (speed) and the best of the HDD (capacity) at a price that can be € 100 for 1TB of storage.
The boot will be almost as fastor that with an SSD and the opening of applications will be slightly faster than with an HDD.
Disadvantages: From NAND Flash we will find 8GB, the rest is pure HDD, hence it is an option to consider (much better than an HDD) but falls short of the performance an SSD can provide having plenty of room to run everything at full speed.
Instructions: The same as in the previous process.
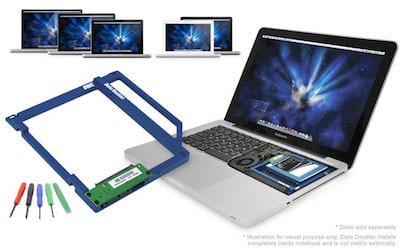
If your computer has a SuperDrive unit and you don't use it, you can buy an SSD + Data Doubler pack, in my opinion the best option.

1. Installing an SSD in the main bay and the HDD in the Data Doubler we can make a homemade Fusion Drive.
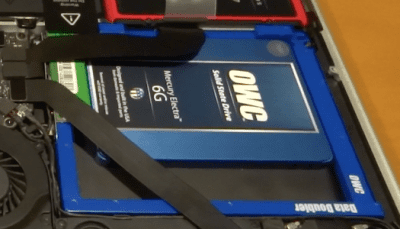
Advantages: Being home we will be mixing 2 storage systems, this gives us the possibility to choose how much storage we want in eachIn this way, we can choose a 60GB SSD as the main one and a 2TB HDD as the secondary one, or if we believe that 60GB are few for the SSD and 2TB many for the HDD, we can choose the combination that we like the most.
Disadvantages: The costs are multiplying, the SSDs of greater capacity and with good benefits require a considerable investment (although a 60GB can be cheap), in addition you have to buy the adapter (which they sell at OWC and which comes in packs with their discounted SSDs), and you have to remove the CD playerIf we want to use it, we will have to pay about € 20 for an external adapter that allows us to connect it via USB.
Click here and select your team for instructions.
Instructions for creating the homemade Fusion Drive:
Preparation: First of all we must create a USB installation of OS X in its latest version. To download it, press GET in the AppStore with the «Alt» button pressed, we can use DiskMakerX to create the USB, it is advisable to make a copy with Time Machine so as not to lose the data since we are going to format the two disks.
Steps to follow:
- Once we have the Mac turned off and the disks installed in their locations, we turn on the Mac and hold down the «Alt» key until a start selector appears, from there we select the installation USB and wait for it to load.
- Before installing anything, we go to the "Utilities" section and open "Terminal".
- In terminal we write the following codes in order:
1. disktil list (Here we must look for the identifiers of the SSD and the HDD that will be displayed style "/ dev / disk1").
2. diskutil cs create Fusion diskX diskY (In diskX we must enter the identifier of the SSD unit and in diskY that of the HDD).
3. discussil cs list (It will show information about the Fusion Drive created, we must note the identifier that appears next to the Logical Volume Group).
4. diskutil cs createVolume (previously pointed identifier) jhfs + Fusion 100% - With these steps we should already have the Fusion Drive created. As soon as the process finishes, go to Disk Utility to check it and proceed with the installation of the system in this unit, you can recover the copy of Time Machine in it without any problem.
2. Mister Spock bending speed, RAID 0
Advantages: The RAID 0 system combines both disks and writes and reads data sequentially on both at the same time, this implies that we will see how the capacity and speed of both discs are added allowing to reach read / write speeds of up to 1GB / s (not to be confused with Gb, 2GB equals 1MB, 1024Gb equals 12MB), this speed will come in handy if we usually work with large volume files.
Disadvantages: To use RAID 0, you need two identical devices, that is, the same capacity and speed, so it is also recommended to use the same brand and model.
But it does not end there, we cannot invite an HDD and an SSD, we must choose one of the two systems and use two of them, if we use 2 HDDs we will achieve speeds of approximately 160MB / s while with 2 OWC SSDs we would achieve 1.200MB / s read / write approximately, this also represents a considerable investment if we want to use SSDs (the good thing is that its capacity would add, so if we want to have 240GB we should buy two SSDs of 120GB each).
As if that were not enough, using 2 devices in RAID 0 makes us have twice the chance of losing data, that is, the data is stored distributed between both devices, if one fails we will keep half of our data, but not the half that may seem, perhaps the video from before explains it better.
Instructions:
- We install two disks of the same model, capacity and speed.
- We start the Mac from an OS X installation USB.
- We open Terminal and enter this:
«diskutil appleRAID create stripe [Name that we want to give to RAID 0] JHFS + disk0 disk1«
3. Time Machine? Doctor Who is not at home right now, RAID 1.
Advantages: A RAID 1 system consists of using two storage devices in which the system will copy the same thing, that is, a file will be copied 1 time for each existing disk, this implies that if one disk dies, we have the other disk with all the data and we can replace or repair the damaged disk so that the system can copy all the data from the disk in good condition to it. With this we make sure not to lose any files since we reduce by half the chances that our system fails (it would be very difficult for both devices to fail at the same time). Be careful, this would not protect against viruses and other malware: if some malware infects our computer it would be infecting both devices at the same timeTherefore, it is an option for the most curious.
Disadvantages: Where do I begin? It does not protect against malware infection, it does not add capacities or speeds, so if we had 2 SSDs of 240GB at 560MB / s our team could use 240GB at a speed of 560MB / s, this supposes a unnecessary cost by paying double for the same benefits (except for increasing the security of our data).
Instructions:
- Same steps 1 and 2 from RAID 0.
- We open Terminal and enter this:
«diskutil appleRAID create mirror [Name that we want to give to RAID 1] JHFS + disk0 disk1«
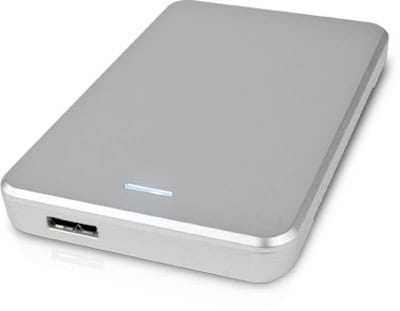
EXTRA: With an OWC pack we can buy an SSD with a SATA adapter, this adapter will allow us to install any 2-inch SATA disk and connect it via USB 3.0Therefore, we can use an SSHD as the main disk or a FusionDrive created with the Data Doubler and insert a conventional HDD into this adapter that we can assign as Time Machine, automatically creating OS X backup copies on it (perfect option if you have any excess 2 inch HDD per house).
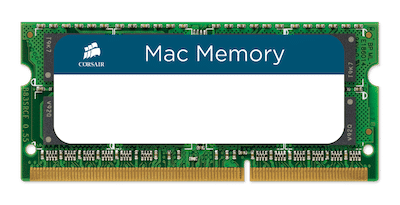
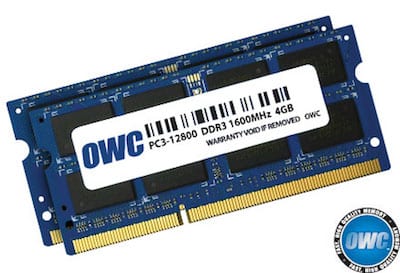
Does your Mac easily drown? Time to upgrade the RAM

If your Mac suffocates as soon as you open a couple of applications, it may be time to upgrade the RAM. This memory is a key component of the system since not having enough or an SSD could manage multitasking well and we would be limited by it.
As in the previous case, here I only recommend two manufacturers (each one designs their products based on the public to which they are directed):
Corsair for gamers, graphic designers and photo and video editing.
OWC for users who browse the internet, use office automation or are developers.
Here the options are rather few, there are not as many as in the previous section. Let's see then what amounts of RAM are unsustainable today, which ones are recommended and why:
If you have 2GB of RAM: Fatal, if your Mac allows it, you must change the RAM immediately, the recommended thing so that you never notice the lack of RAM is to install 8GB, but if your Mac only allows 4, install 4, the improvement you will surely notice, doubling the amount of RAM you will see how the applications run together without drowning the system and as even despite having a few open apps you will not lose control of the system.
If you have 4GB: Better but equally bad, we are in the situation as before, the 8GB is the base from which you should start, if your Mac allows it, install 8GB of RAM, you can run as many apps as you want that you will not lose control of the system due to it.
Also think that many Macs come with Integrated GPUs, these graphics cards use shared memory, in other words, RAM memory is reserved For them, knowing this we can deduce two things; The first is that if we have 4GB of RAM and an integrated GPU, we will surely have 3GB left for us, the second is that when the video memory is shared it can be increased, which is very likely that if you increase the RAM the GPU also reserve larger video memory, which will surely bring improvements in your activities with video games, videos and photos.
If you have 8GB: Well, it is the amount of base RAM that every computer should have, it is enough RAM to play, so that the GPU is not a conflict when borrowing memory and so that the apps work without drowning the system.
Despite this, it can be improved, if you would like to edit photos or videos you should consider upgrading to 12 or 16 GB.
If you have 12 or 16GB: The perfect amount of memory, with this amount the system will never drown, on the contrary, having so much RAM available it is most likely that OS X uses part of it to create a file cache, this will cause the most used files to be copied to RAM so that the next time we open them that opening is instantaneous, and even by opening all the applications we will not be able to consume all the memory, I have 16GB and my MacBook has never consumed more 10GB without help.
What kind of help? You will think ... Well this is the best, having so much RAM we can dedicate part of it to our experiments, for example using Parallels we can assign 6GB of RAM to Windows so that both OS X and Windows run perfectly fluid and run at the same time, or we can use the app iRamDisk to create disks with RAM (The RAM is erased every time the system is turned off, so we must be careful what we store there), on these disks we can even store the Safari cache, getting access to this data of more than 2.500MB / s .
If you're a gamer and have a MacBook Pro, why not turn it into a desktop computer?
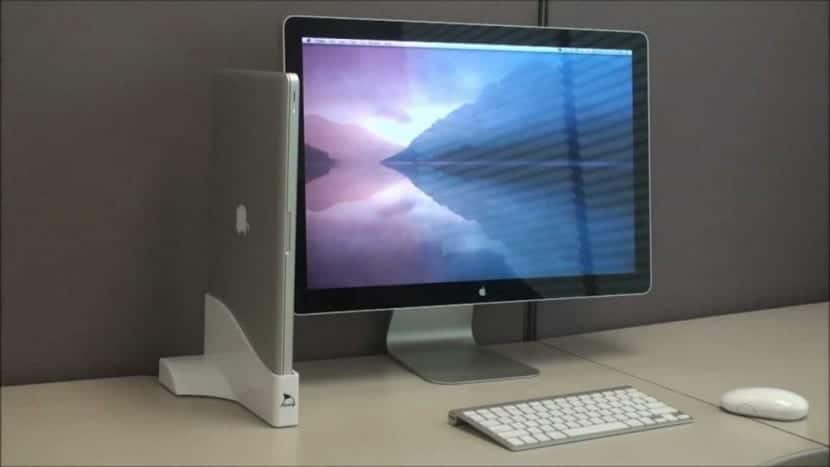
MacBook Pros use high-quality hardware and that even the models of 2011 and 2012 today still have a lot to say, it is for this reason that we can make a couple of investments to have a home at home. play station / media center in which to use our MacBook Pro as a nerve center, a device that provides us with the greatest comfort both at home and away from home.


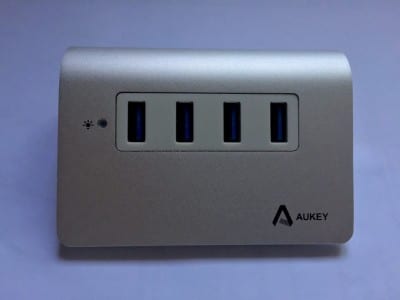
AUKEY USB-Hub
Software to optimize
Now comes that part that serves us all, whatever Mac we have, a small list of programs that will keep our experience with OS X in shape:
1.OnyX

With this small program we can activate / deactivate hidden system functions, keep the computer well optimized using dedicated scripts fiddling with settings that allow, for example, deactivating the annoying startup sound of the Mac.
2.Qihoo 360 Security
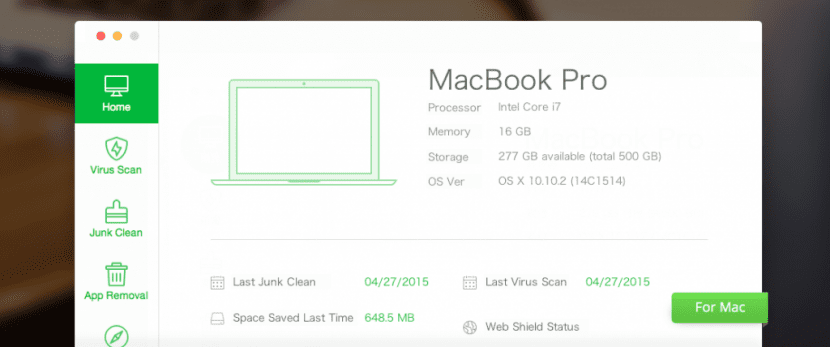
The OS X system is very safe, of that there is no doubt, especially if we have restricted the installation of apps to "Mac AppStore" only, yes, this does not mean that we can not find Malware online, hence this light and free antivirus will be our best ally, it will protect our browsing in Safari (or whatever browser we use) with a Shield Online and it will ensure that we do not execute any dangerous program for our system, all this silently and without hogging our precious resources.
It also includes a configuration checker where we will know the hardware of our equipment in detail, an application manager that will allow us to uninstall them and even a garbage cleaner that will keep our caches and other key locations clean to avoid being left with a slow computer and without storage space.
3.Disk Sensei
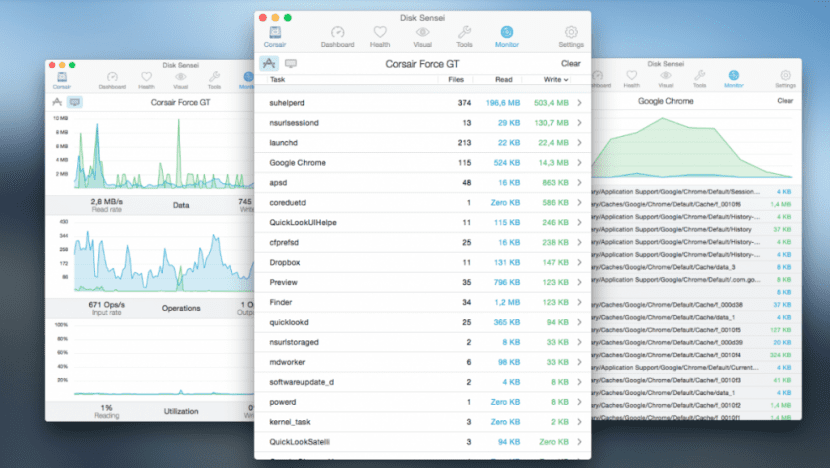
A utility that should not be missing on our Mac, the best when it comes to managing our disks, will allow us to perform tests on our hard drives to check their status and health, view temperatures and different reports, wood our disk graphically, ACTIVATE AND DEACTIVATE TRIM (In fact, this utility is mandatory if you decide to put an SSD in your Mac, especially when it uses the native method introduced by OS X El Capitan).
We can also activate or deactivate features such as the "sudden movement sensor", a sensor that is responsible for stopping the hard drive in case of movement to avoid data loss and that having an SSD installed does nothing but waste energy, since SSDs do not have mobile mechanical components, so it does not suffer from this problem.
It also includes a key location cleaning system and a benchmark that will allow us to check the read / write speeds of each disk.
4.AppCleaner
Small free utility that will allow us to uninstall any application and with it all the garbage that it leaves scattered throughout the system.
5.MacClean
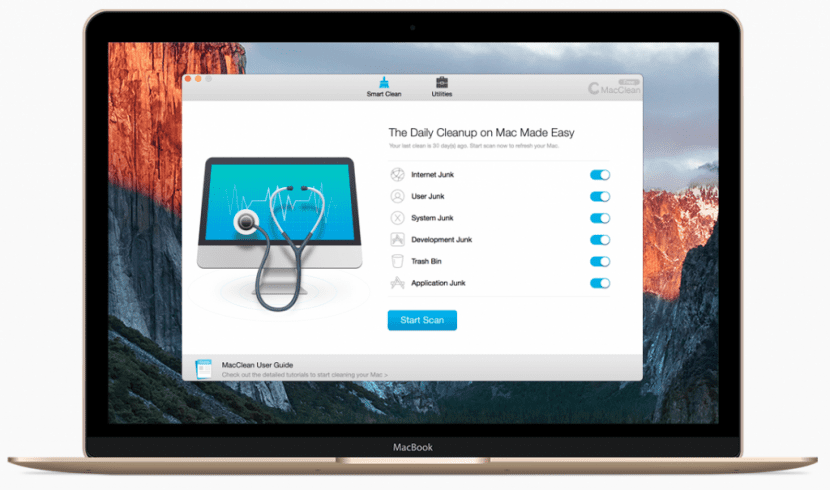
A free cleaning suite that includes everything, cache cleaning, duplicate file search, large file viewer, binary cutter, language cleaner, and more utilities.
Ultimately, the free replacement for Clean My Mac.
Upgrade software
But not all software is dedicated to cleaning and maintaining our equipment, there are other utilities that are equally or even more essential that are dedicated to improving our experience with our Mac, and I gather here a few of them:
1.Boom 2
INDISPENSABLE, I find it difficult to describe in words the change you are going to experience with Boom 2, it is a utility that your computer will analyze to find its sound output, once detected it will perform a small test and optimization that (and I'm not kidding) will change the sound experience of your equipment forever.
This utility will create a custom equalizer profile for your equipment based on its native audio, the improvement is noticeable from second 0, once you try it there will be no going back (I recommend recording before and after video, more than anything because if you uninstall it, you will have the feeling that your speakers are not working well, but nothing further, you can see that what has happened is that the audio on your Mac goes from mediocre to sublime when you have Boom 2 installed).
And it does not stop there, in addition to improving the sound of your Mac it will also allow you to enhance it with its software amplifier, You can turn the volume even louder!, and includes different profiles in case you are one of the most demanding in terms of sound, it also includes effects such as "Ambience" for when there are no voices involved, with this function activated we will have a more enveloping sound, other functions are "High Fidelity" , "Spatial", "Night Mode" and "Pitch", it has a 15-day trial so I would test it at your place and prepare the portfolio for the license, I'm sure you won't be able to see your Mac again without Boom 2 .
2. Macs Fan Control
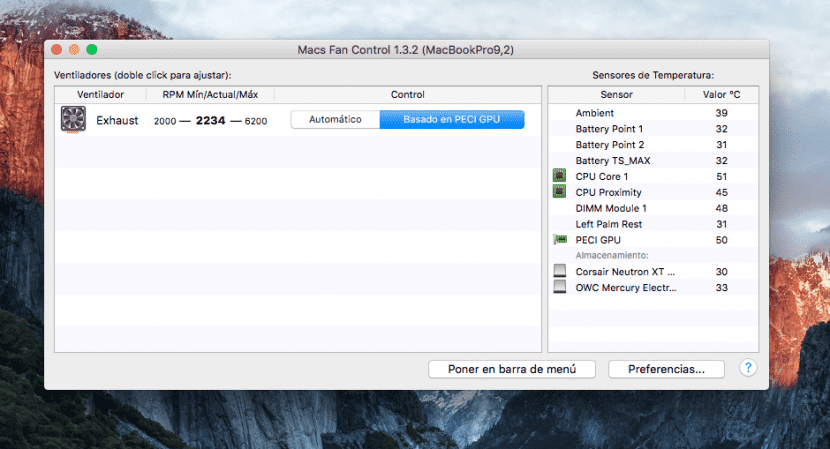
INDISPENSABLE, another essential utility for Macs, as long as they have clear fans. Summer is when our teams suffer the most, especially if we make intensive use of their graphic section, occasional gamers will know what I mean, it is to open a game and our Mac becomes red hot (dramatization), many times this results annoying, for the same reason a program that control temperatures and regulate the cooling system depending on it is essential.
With Macs Fan Control you can establish some points from which the utility will accelerate the fans of the computer to reduce the temperature, these points are based on the temperature reading of some sensors, I recommend that you do it like this:
If you are users who give it cane To video games, video and photo editing or graphic design, set the GPU cost as a benchmark and set the fan to accelerate when it exceeds 55ºC, which goes to the maximum if it reaches 70 or 75ºC.
If you are, on the other hand, users who use office applications, surf the internet or any other type of utility that don't require the GPU I recommend that you establish your CPU as a reference point, core 1 to be precise, in this way when our CPU enters Turbo Boost or begins to look overloaded and increases its temperature progressively, Macs Fan Control will take care of giving it a good Air blast when you need it most so that it can't stabilize or cause system problems.
Why is this utility essential? The temperature of our components is a key factor for the performance and stability of our equipment, if a chip reaches a critical temperature could irreversibly damage hardware of our equipment, if on the contrary a chip is always in high temperatures this will affect the performance of our equipment that will try not to overload it so that it lowers its temperature, causing worse performance and even system instability many times.
¿Why I Recommend Macs Fan Control about utilities like TG Pro or SMC Control? Very simple, to begin with it is a free utility, but that is not all, it has proven to work perfectly and have a useful and friendly interface, in addition to that it has a version for Windows with which a user can have it installed both in OS X and Boot Camp the same utility that manages temperatures and thus ensures a long life and good performance on your computer, because honestly, the management of Windows cooling on a Mac is terrible, in Boot Camp the fans seem not to turn on until components reach high temperatures, and this is not only annoying but also dangerous for the equipment.
3.iRamDisk

I have already talked about this utility before, with it we can create virtual disks using a part of our RAM memory, obviously to use this utility we must make sure we have a minimum of 8 GB of RAM, otherwise we will be removing a RAM that is already missing from the system.
Thanks to iRamDisk we can create a drive dedicated to the Safari cache (an option that the app itself proposes and performs in a simple way), with this we will have a much faster navigation by having a higher access speed to said cache and also we won't have to worry about deleting this cache every so often since the RAM is emptied every time we turn off our equipment.
Another utility of this app is the power create disks to store a specific app, this application will enjoy a much higher access speed than the others and will allow us to work with it very quickly, perfect for example to store Final Cut Pro libraries, Xcode Projects or photos that we are going to edit.
WATCH OUT: Keep in mind that as I mentioned this memory will be erased when we pay for the equipmentIf you are going to store something important on these disks, check the box "Make a backup" so that when the system is turned off the data is copied to the disk so as not to lose them, you can also mark "Create at startup", in this way the disk will be created when the computer starts and we will not have to repeat the process every time we want to use it.
Public Data
4.paste

This utility is very simple, thanks to it our clipboard will have a predefined size history that we can access with a keyboard shortcut, perfect for writers and other people who need to keep this type of data well organized, we can copy 100 or more things at the same time to our clipboard and access it whenever we want to select what information we want to paste, this includes links, text, photos, files, anything.
For the most detailed, this application includes rules by which DO NOT copy data extracted from applications like 1Password, LastPass or iCloud KeychainIn this way, anyone who accesses our clipboard will not see if we have ever copied important passwords, we can add the locations or applications we want to the excluded list.
5. Hider 2
With Hider 2 we can create an encrypted trunk that will contain our most personal files, such as confidential documents, photos, videos, invoices or whatever, this trunk will be saved on our well-protected disk so that no one can access its content without the application Hider 2 and the password that we have predefined, we can open and close the trunk at our whim with keyboard shortcuts or with the assistant that will remain in the status bar and add notes or files whenever we want, perfect for keeping our most personal files away from prying eyes.
6.CrossOver
With CrossOver we can avoid us installing a virtual machine Windows or even Boot Camp and run "natively" compatible Windows applications, such as video games or other software that does not require drivers (since we did not go to that extreme when making a port), perfect for playing a video game that is only available in Windows or to run a utility that we do not have in OS X.
RAID1 doubles the read speed, since it is done the same as RAID0. Both discs have the same, so while you are reading a part of one of them, you are reading the other part of the file on the other disc.
Great post congratulations. Downloaded disk sensei and boom 2 to test them
Thank you very much, it is a pleasure to help, I am sure you will love both applications!
Thanks for the post, it's fantastic. Could you tell me a trusted store in Madrid where they make any of these modifications? Thank you very much
An AWESOME post !!! Very hard-working, thank you very much because I will surely put some of these things into practice.
As for the SSD that I have been thinking of taking it for a long time, how do you see the Corsair XT of 240gb?
Thank you
Thanks for the post. It's fantastic. Could you tell me a trustworthy store in Madrid where they would make some of the improvements that you propose to us? Thank you very much
I add another question. How is the page and components of OWC? Do you have to pay customs when they arrive? If so, how much is it? 21% VAT?
Thank you
Hello Carlos, thank you for your qualifier, it is very gratifying ^^ I answer you in this one also:
Both OWC and Corsair have very high quality products, the differences lie in more subtle things, for example, if you want to use Boot Camp on your Mac (games run better on Windows) Corsair is the one, it has official tools in Windows and You will surely get better performance for your games, if on the contrary you only use OS X, the best is OWC, they have been dedicated to Mac since its inception and are experts in the field, their SSD incorporates more sensors and has a system of own recycling TRIM style for when it could not be activated natively (BEWARE, they recommend activating TRIM whenever possible in El Capitan since it is an addition that will extend the useful life of your SSD¨), both obtain similar speeds and are in a similar price range, the choice depends on the use you are going to give it.
As for customs, if you buy on the OWC website (macsales) it does include customs charges, a colleague bought € 230 and paid € 85 taxes, however on the web you will find the components and packs at a better price than in other distributors that sell OWC, for that reason it is best to calculate for yourself if paying customs costs you, you can always find their products on Amazon.com ^^
Good John, the truth is that the post has helped me a lot. Very well explained everything;).
I'm going to use it more for regular use and maybe some photos and videos but little else. I was looking at OWC and I think it was better to buy it there because even with customs it was cheaper, the problem I saw was the issue of the guarantee.
In the end looking a lot, I opted to buy the Samsung Evo 850 240gb. I had bought it a couple of weeks before for € 95 for an older laptop and I saw that it was going well and it is on sale at € 80 so I got it.
http://www.amazon.es/gp/product/B00P736UEU?redirect=true&ref_=nav_ya_signin
By spending less I also bought the case to change the CD player and put the original hdd there and the reader in the external case.
And finally next month I will expand the memory to 16GB and I will have the laptop well prepared.
Perhaps the hard disk is not the best choice but it is the first and with the expensive price I also do the memory and the casing. If later on I crash the ssd then I'll go for an owc or corsair.
Thank you very much for your comment.
All the best
PS: I already have the ssd on and it is wonderful, this weekend with time I start to change the cd unit.
If you do not buy for a value greater than 150 euros, do not open customs charges, I bought the 3.5 to 2.5 adapter from newer tech and the tools to open my iMac, the only thing I bought in Spain was the Samsung SSD and a tera and I removed the HDD of my iMac from a tera, but I plan to put a Raid 0 and put another SSD from a Tera in the super drive bay with the OWC data doubler.
Excellent post ... I bought a mac mini 2014 and it has 8 gigs of ram ... I didn't know and they didn't tell me when I bought it that it can't be updated ... I put an ssd on it and it flies ... it's incredible .... Is there any trick to improve the use of memory or to optimize it so that I don't run out of memory quickly?
You can use Memory Optimizer or some similar program that helps you free up memory when it is full, despite this, with 8GB you have enough for perfect operation funcionamiento
those who are in Capitan and cannot do RAID here is a video that I made so that they can recover Yosemite Disk Utility where if you have the option of RAID https://youtu.be/ThPnpLs3pyA
Juan, the post is great, I just landed here and it is a very good article. How much help in so little place. Great, I'll be waiting for your recommendations!
Excellent post, especially the application of the fans has lowered the temperature by 5%, it's great, thanks.
Very good post, although I disagree on the "annoying" startup sound, many times it informs us that the pram needs to be reset